Additive Manufacturing
PFAS Substitute Qualification
Mechanical Characterization
Metallography
Defect Analysis/Fractography
The collapse of roofs, bridges or even entire houses is more often than not caused by the subpar quality of the construction materials employed or by a flawed calculation of the least load-bearing capacity. Qualities like strength, malleability, solderbility and corrosive properties are of great importance in regard to this.
Mechanical Characterization

In addition to the properties of electronic components, we at HTV have been dealing with the mechanical properties of construction materials for a long time. Regarding this we mainly concern ourselves with such areas of interest as strength verification, component testing as well as standard construction material testing.
The processability and the employability of contruction materials are often dependant on their material strength and work hardening capacity, properties, which we ascertain and interpret using tensile tests. One such testing method, to measure a property related to material strength, is the hardness test. Using nanoindentation allows us to measure hardness as a function of position and penetration depth. With this high resolution method we can also measure the hardness of thin galvanic layers, starting from a layer thickness of 1 µm and upward.
The Dye & Pull test is used to test the integrity of solder joints. The solder joints to be tested are dyed and then subjected to mechanical stress up to the point of fracturing. Fractures already present before the test are now dyed and visible under the microscope.
We can provide you with the development of a mechanical analysis process tailored to your individual requirements.
Metallography
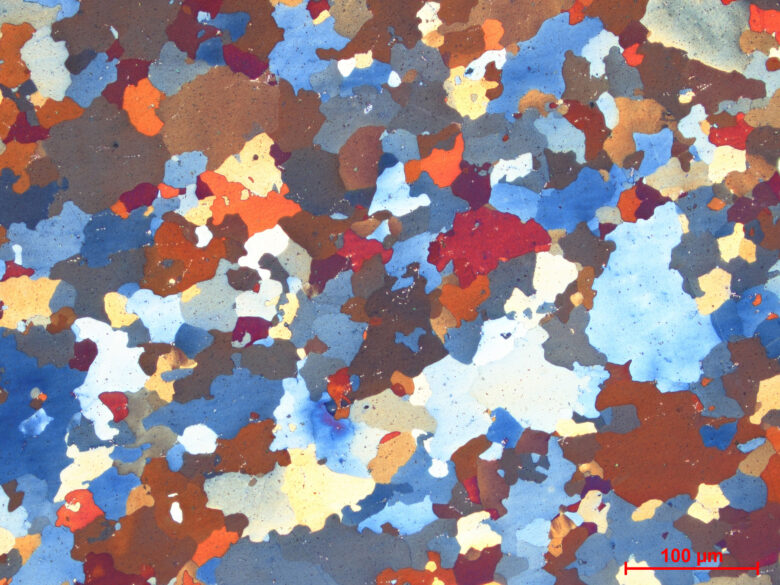
Through targeted influence on the internal (crystalline) structure of materials, their properties can be changed. To analyze this structure, HTV employs a wide set of state of the art methods for microsectioning. Chemical etching is used to access the materials’ inner structure which allows us to analyze important properties such as grain size, segregation and texture. Using the ion beam etching method MetaFinePrep® enables us to prepare and analyze the structure of more complex material combinations, such as those present in solder joints. The prepared samples are analyzed under a light microscope. Additional SEM/EDX analyses are used in regards to structure characterization to analyze very small structures and ascertain their chemical composition.
In addition to structure analysis it is also recommended to measure the hardness usung nanoindentation. This can ascertain possible correlations between structure and hardness and may even be used to analyze the hardness of individual structure phases, making it possible to identify dangerous brittle components.
Defect Analysis/Fractography
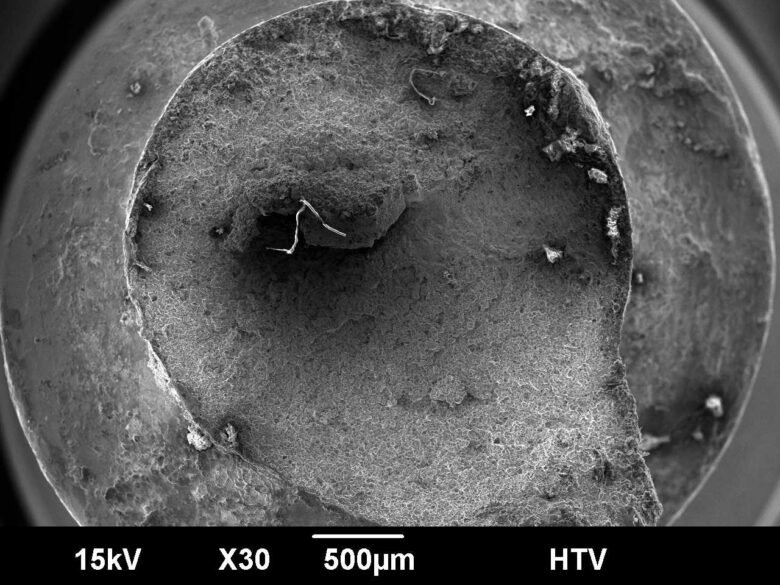
A component fracture is more often than not caused by either inappropriate usage or strain of the component, or defects in the material. Finding the causal factor for this defect is of vital importance, which is why fractography is an integral component of the HTV defect analysis.
To start, the fracture surfaces are visualized under a light microscope to document their position, their appearance and possible corrosive products. Additional SEM analyses are used in visualizing even the smallest structures on the fracture surface to ascertain the actual cause of the defect (such as vibration fracture, hydrogen embrittlement, ductile fracture). The fracture surface analysis is often combined with other material analysis methods, such as metallographic analysis or mechanical characterization, to gain a complete comprehension of the defect.

